Effective Ways to Create Paper Mache in 2025: Get Started Today!
Effective Ways to Create Paper Mache in 2025: Get Started Today!
Understanding Paper Mache: The Basics and Materials
Creating paper mache is an art form that has been enjoyed by craft enthusiasts for decades. It’s a method that uses paper and paste to cover forms to create 3D sculptures, masks, and various artistic objects. Understanding **how to paper mache** effectively is crucial if you want to succeed in this creative endeavor. The essential **paper mache materials** needed include **newspaper**, cardboard, paints, and a strong bonding agent, which can be glue or a homemade paste made from flour. In 2025, sustainable crafting has become a priority; therefore, utilizing recycled paper products for creating paper mache objects not only promotes eco-friendliness but also contributes to cost-effectiveness in crafting.
Basic Paper Mache Recipe: Paste Preparations
One of the first steps in mastering **paper mache techniques** is knowing how to prepare your paste. There are numerous recipes to choose from, but the classic **paper mache flour mixture** is popular for its convenience and effectiveness. To create a simple paste, mix one part flour with two parts water in a bowl, stirring until you achieve a thick, smooth consistency. Some crafters prefer adding a pinch of salt to prevent mold during storage. For those seeking quick solutions, ready-made **paper mache paste** is available, but experimenting with homemade recipes can enhance your crafting experience.
Choosing the Right Paper for Mache Projects
Besides knowing **how to make paper mache** paste, selecting the best materials is critical for successful paper mache projects. While newspaper is the traditional choice due to its availability and texture, experimenting with magazines or tissue paper can yield unique results. Using **shredded paper for mache** may also simplify the process; just soak it in water, blend it to a pulp, then mix it with your paste for added strength. Each material brings distinct qualities that can influence the final look of your projects, making it fun to explore different combinations.
Creating With Paper Mache: Techniques and Projects
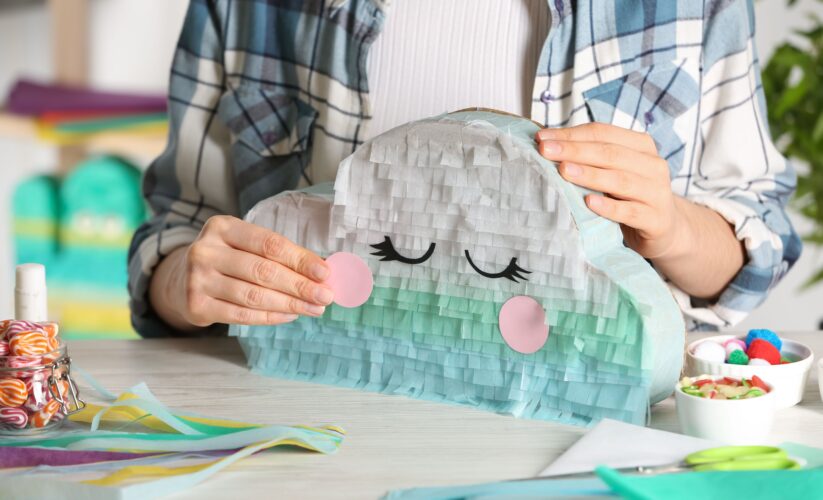
Now that you have a grasp on basic preparations, it’s time to dive into **paper mache projects**. The creativity involved in crafting with paper mache is limitless, ranging from simple objects for kids to more intricate **paper mache sculptures** for artistic expression. Understanding various **paper mache techniques**, like layering, is essential. By applying multiple layers of paper, you can achieve a sturdy structure and unique designs. This technique is particularly effective for creating **paper mache balloons**, which can serve as perfect forms for bowls or decorative art pieces.
Step-by-Step Guide: Crafting a Paper Mache Balloon
If you’re wondering **how to start paper mache**, consider the fun and straightforward project of creating a **paper mache balloon**. Begin by inflating a balloon and securing it with string. Next, dip strips of your chosen paper into the prepared paste, ensuring they’re fully coated. Apply the strips to cover the balloon, overlapping them for strength, and leaving a small opening at the bottom to release the balloon later. Let it dry completely for 24-48 hours and then pop the balloon. The resulting shell can be painted and decorated to create a stunning finished product, showcasing a beginner-friendly approach to **crafting with paper mache**.
Paper Mache Tips for Beginners
For anyone starting out in paper mache, there are some critical tips to keep in mind. First, be patient during the drying process; slow drying often leads to better durability and fewer cracks. Second, consider experimenting with textures and decorating techniques once your piece is dry. Chalk paint, acrylics, and glitter can transform your creation, opening avenues for **decorating paper mache** art. Lastly, don’t be afraid to make mistakes; they’re part of the learning journey and often lead to unexpected artistic outcomes.
Advanced Techniques: Sculpting and Unique Designs
Once you’ve mastered the basics, advancing in **paper mache art** can be quite fulfilling. Techniques for **advanced paper mache** include using molds to shape your projects. Molds can be purchased or crafted at home, allowing artists to create intricate designs and characters. Furthermore, using armatures—structures that support the paper mache—can greatly widen your artistic possibilities, particularly when sculpting figures or animals. Sculpting with paper mache opens a world for creative expression and can lead to stunning visual statements.
Creating Unique Paper Mache Figures
If you’re considering **creating paper mache figures**, imagine crafting a themed sculpture, such as a fantastical creature or an abstract design. Start with an armature made of cardboard or wire and layer strips of your paper/mache blend over it. Gradually build up the layers until you achieve the desired shape and thickness. Make sure to refine details, paying attention to facial features or textures. Once dry, paint your piece, adding dimension and character to your creation. This approach not only enhances your skill but also results in an impressive showpiece.
Coating and Waterproofing Paper Mache
After you’ve finished sculpting and designing your paper mache project, remember to consider how to protect it. **Paper mache waterproofing** is beneficial, especially for outdoors or frequently handled items. Coating your finished piece with waterproof sealant or varnish can guard it against moisture damage. If your crafts are intended for kids or decorative use, this step ensures longevity and keeps the colors vibrant, contributing to the durability of your artistic creations.
Frequently Asked Questions about Paper Mache
1. What is the best way to dry paper mache projects?
The ideal method for drying **paper mache** projects is to allow them to air dry in a cool, dry place. Avoid direct sunlight or heat sources, as these can warp the paper. Ensure the layers are not too thick at once; this may lead to slow drying and even mold. Proper airflow is crucial for consistent drying.
2. What type of glue can be used in place of traditional paste?
If you’re looking for **glue alternatives for paper mache**, options like white school glue mixed with water can work well. Some artisans use liquid starch for a different texture and bonding power. Experimenting with these can lead to different finishes and strengths, enhancing your crafting versatility.
3. Can you paint paper mache before it’s dry?
It’s generally advisable to wait until your **paper mache** object is fully dry before painting it. Painting on wet paper can weaken the structure and lead to incorrect finishes or colors. However, if you’re looking to incorporate paint into the paste itself, that’s an innovative technique for creating colors right at the start of your project!
4. Are there any eco-friendly options for paper mache materials?
Yes, recycling is a significant aspect of practicing art sustainably. Using **recycled newspapers** or **upcycling** scrap paper are excellent ways to enhance hardware projects and reduce environmental impact while engaging creatively with the medium of paper mache.
5. How can I ensure my paper mache crafts can be displayed outside?
To display your **paper mache** creations outdoors, finish with a coat of waterproof sealant after painting. This will help protect your art from the elements. Additionally, make sure to use sturdy layers and materials that can withstand moisture to prevent damage over time.
6. What can I use to strengthen my paper mache projects?
To **strengthen paper mache**, consider applying additional layers and ensuring thorough drying between each application. Techniques like adding shredded paper or using liquid starch can also boost durability, making your art last longer while maintaining its design integrity.
7. Are there special techniques I should know before starting complex paper mache projects?
Before diving into advanced **paper mache techniques**, familiarize yourself with basic structuring methods and proper layering. Consider strengthening through a well-crafted armature and utilizing diverse paper textures for enriching your project. This groundwork will support you in executing more intricate designs effectively.
Key Takeaways
- Understanding the basics of **how to paper mache** starts with mastering simple recipes and applying the correct materials.
- Exploring various **paper mache techniques** opens opportunities for creativity in projects ranging from children’s crafts to intricate sculptures.
- Proper finishing through waterproofing and embellishing can enhance the visual appeal and durability of your paper mache art.
With many avenues to explore, **paper mache** crafting is not just about creating objects; it’s a journey of creativity and expression. If you’re looking for a new, fun experience, dive into paper mache—your artistic potential awaits!
Ready to get started? Gather your materials, turn on some music, and unleash your creativity through **paper mache** today!